

Porch Makeover Inspiration: See How One Couple Created a Tropica…

Q&A with Organizational Pro Peter Walsh + Dermatologist Shares A…

Actor Hank Azaria + Freezer Meals + Artichokes 2 Ways with Rach

See Inside Barbara Corcoran's Stunning NY Apartment + It's Steak…

How to Make Chicken and Lobster Piccata | Richard Blais

The Best Moments From 17 Seasons of the Show Will Make You Laugh…

Donnie Wahlberg + Jenny McCarthy Say Rach Is Such a "Joy" + Look…

Donnie Wahlberg Spills Details About NKOTB's First Ever Conventi…

How to Make Crabby Carbonara | Rachael Ray
Rach Chats "Firsts" In Flashback From Our First Episode Ever In …

Rach's Chef Pals Say Goodbye to Show in Surprise Video Message
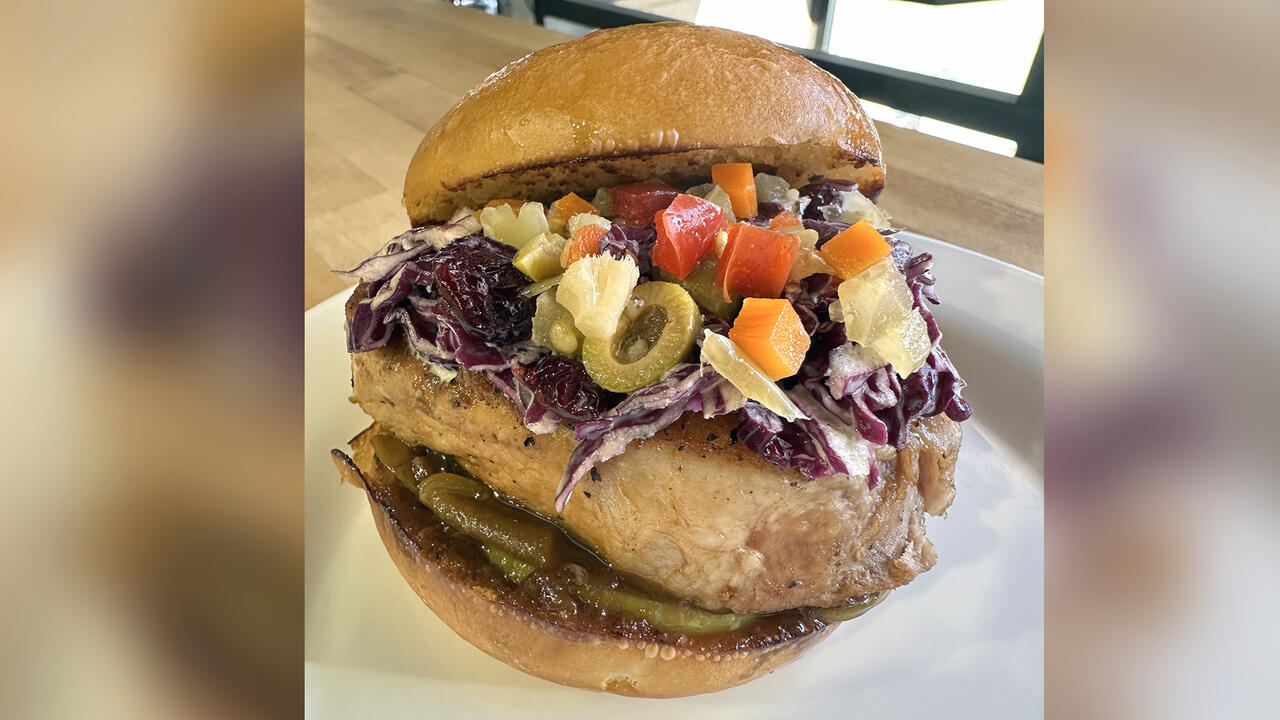
How to Make Apple-Cider Braised Pork Chop Sandwiches with Onion …

How to Make Sesame Cookies | Buddy Valastro

How to Make Tortilla with Potatoes, Piquillo Peppers and Mancheg…

How to Make Shrimp Burgers | Jacques Pepin

Andrew McCarthy Chokes Up Discussing Emotional Trip to Spain wit…

Celebrity Guests Send Farewell Messages After 17 Seasons of the …

Celebrity Guests Send Farewell Messages After 17 Seasons of the …
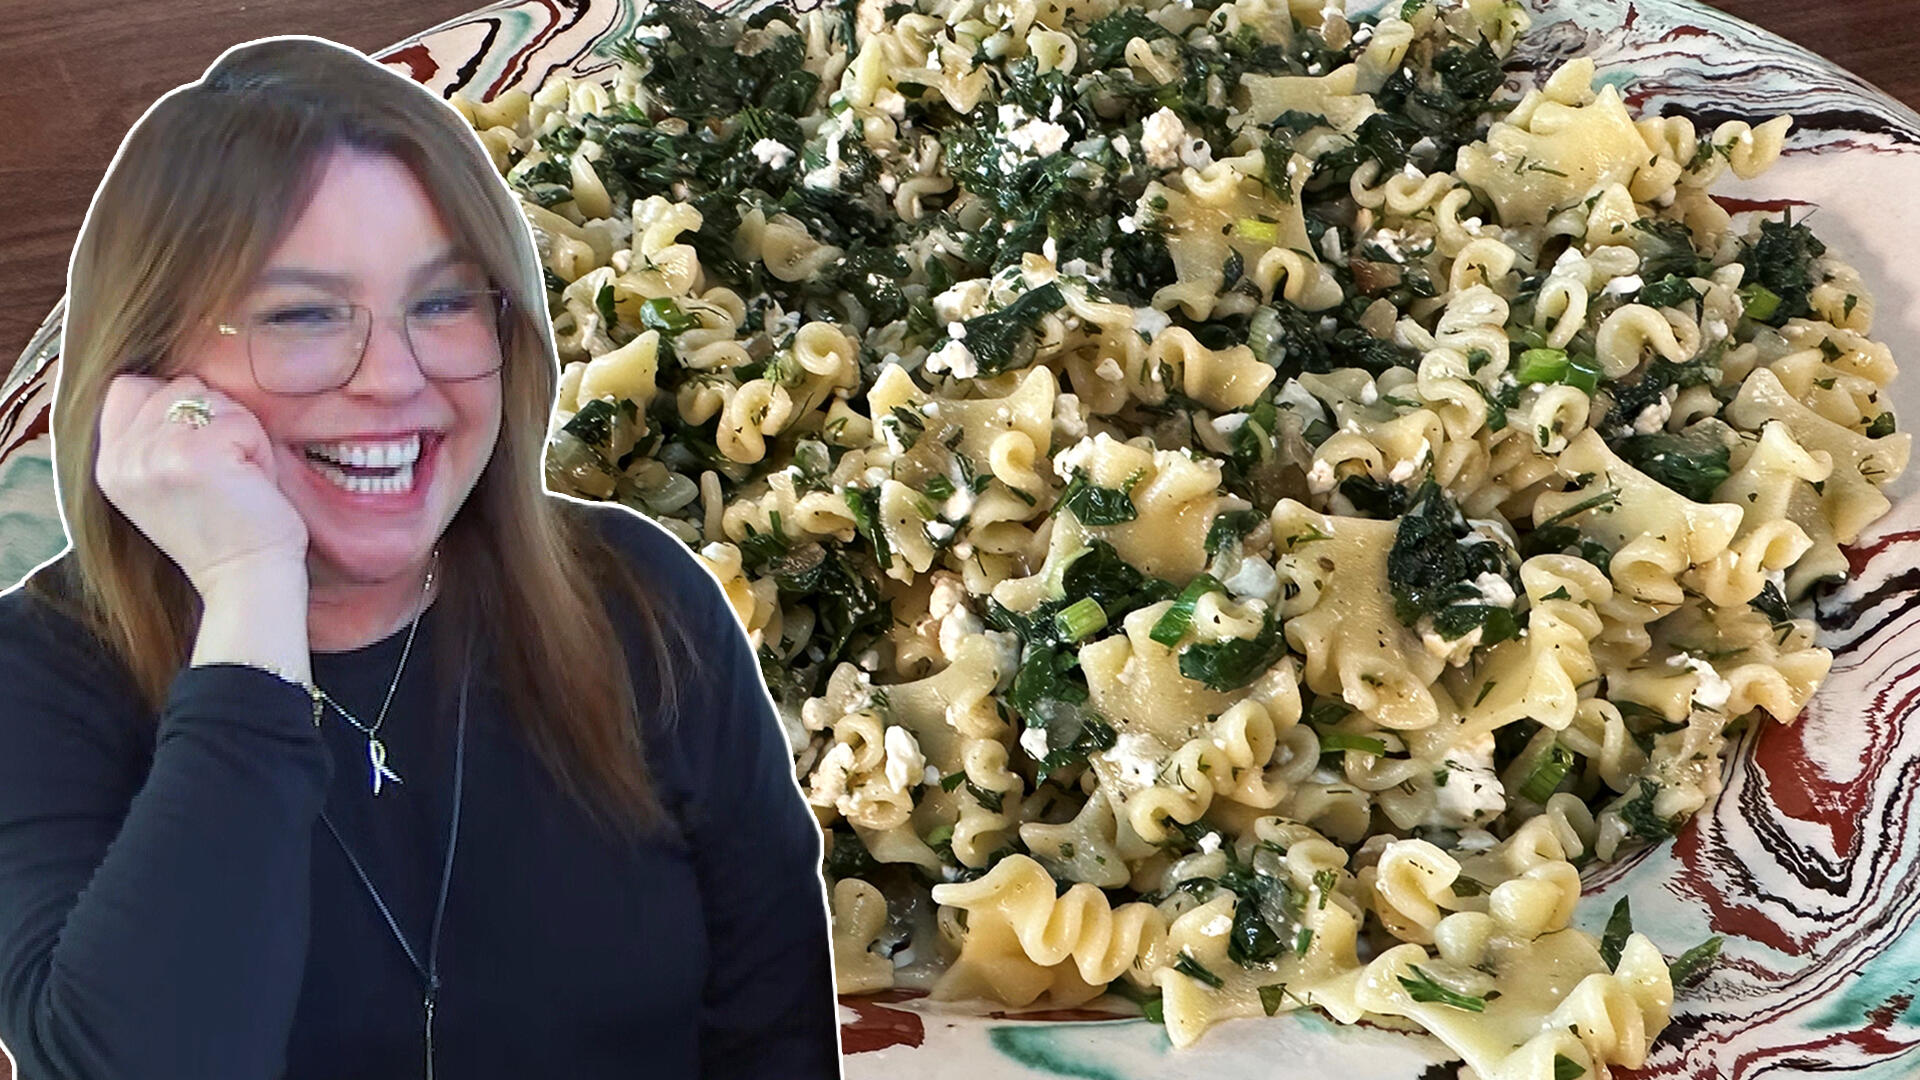
How to Make Spanakopipasta | Rachael Ray

Andrew McCarthy Teases Upcoming "Brat Pack" Reunion Special

Michelle Obama Toasts Rach's 17 Years on the Air With a Heartfel…
Each product has been independently selected by our editorial team. We may receive commissions from some links to products on this page. Promotions are subject to availability and retailer terms.
We get it — all this time at home is starting to get old. If you're looking for a new DIY project that will not only keep you busy, but will also help spark joy at home once it's complete, look no further!
Tabitha and Andrew, viewers from Williamsburg, Virginia, are sharing how they gave their back porch a makeover with major tropical vibes after their family cruise vacation was canceled due to the pandemic. "Instead of being sad for too long, we decided, why not turn our back patio into a place that feels like an escape from our everyday lives?" Tabitha writes on her blog. "We decided, what better thing to do than to bring the vacation home to us?" Andrew adds.
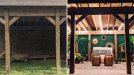
Here's what the back patio looked like before. According to Tabitha, it was "more of a storage area where [Andrew] would store scraps of wood… It was muddy and dark, so we never came back here."
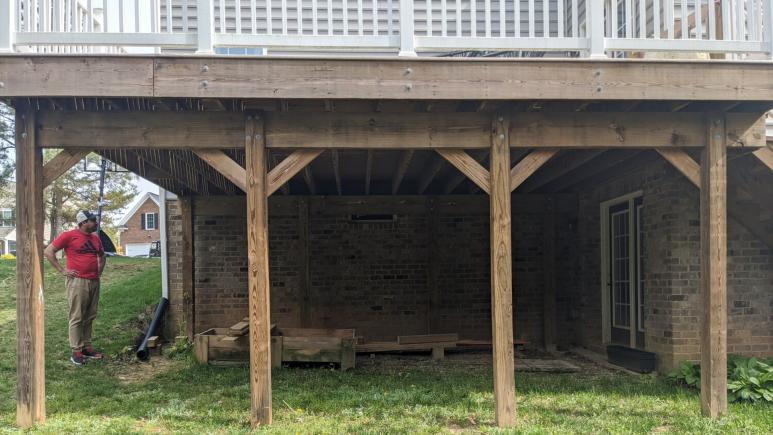
TabithaSewer.com
The finished backyard oasis is gorgeous — talk about making the most out of a disappointing situation!
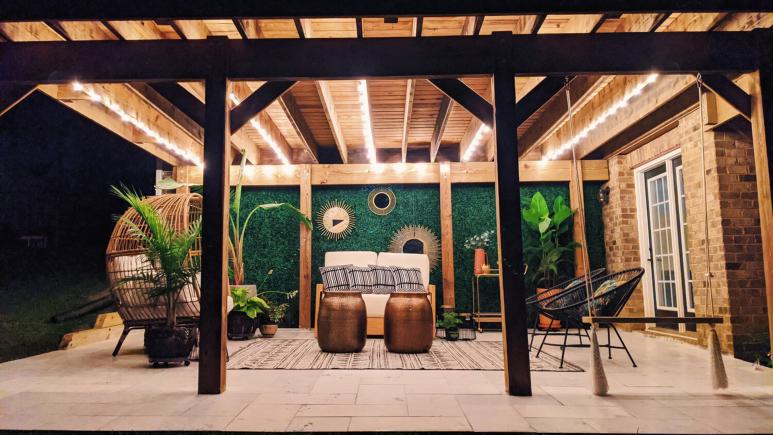
TabithaSewer.com
Watch the video above to see the transformation, and read on for more details, including materials similar to the ones Tabitha and Andrew used to accomplish this DIY project.
STEP 1: LAY THE FOUNDATION + TILE

TabithaSewer.com
"For the foundation, we hired a professional to pour the concrete and my husband and I and our two kids laid the tile ourselves," Tabitha says.
They chose a white and gray marble porcelain tile. "I LOVE the idea of light tile in this space because it brightens the area," Tabitha writes on her blog.
Shop similar tile here: Matte Porcelain Floor and Wall Tile
STEP 2: ADD GRASS

TabithaSewer.com
"I would HIGHLY recommend this option if you are looking to fill some space in your yard. We wrapped the sod all the way around our back patio and had enough to stretch out to the middle of our yard," Tabitha writes.
STEP 3: HANG ARTIFICIAL GREENERY
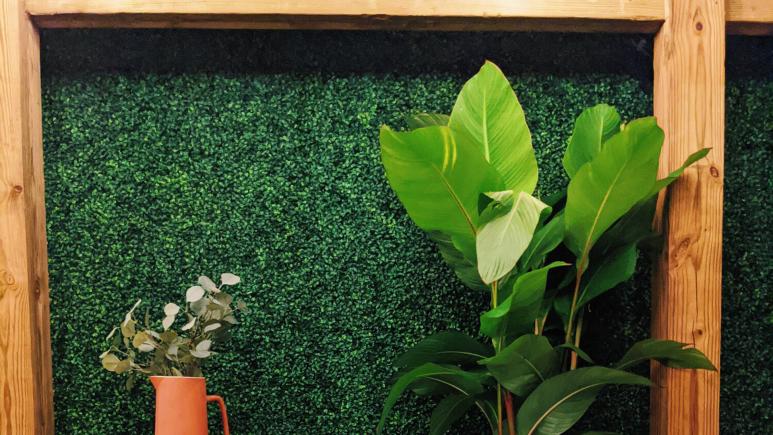
TabithaSewer.com
"The brick darkened up the space, so we decided to cover it up in this artificial boxwood panel, which is UV protected and weatherproof," Tabitha says. "All we did was measure the wall before we went ahead and purchased the amount of boxes that we needed. It was pretty easy to assemble — we attached the boxwood panels to a piece of wood at the top, which allowed it to drape down."
Shop similar boxwood panels here: Artificial Boxwood Greenery Panels
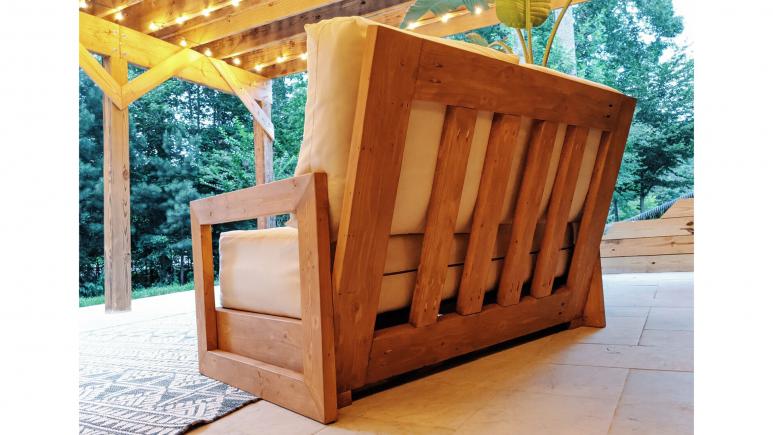
STEP 4: DIY COUCH

TabithaSewer.com
"We built a couch! We have zero experience in building one, but we decided to go ahead and give it a try," Tabitha says. "My wife showed me a picture of what we wanted and I went to our local store, got the materials that I needed, and through a little trial and error I was able to put it together," Andrew says.
"I went ahead and got foam and I stacked a couple of them together to get the height that we wanted. Then I wrapped it in a polyester batting. For the cushions, I sewed that up myself. It looks so good. We couldn't be more proud of the finished product!" Tabitha says.
You can shop the materials Tabitha and Andrew used and get additional tips below.
For the couch cushion:
"This material is meant for outdoors. It's waterproof and mildew resistant. As for the construction, it is 2" thick, so we stacked 5 layers to get the thickness that we needed for the seating. It holds our weight extremely well and it looks just like our inspiration," Tabitha writes on her blog.
"I used two zippers. The two zippers met in the middle at the center back. I love the detail finish of the zipper and I made a flap at the back to allow for easy insertion of the cushion."
"It's important that you get the 100% polyester material because it is also mildew resistant and it's most commonly used for outdoor furniture. The batting is used to wrap around the cushion. It not only adds an extra softness to the cushion, but most importantly, it cleans up the uneven edges of the foam inside. The batting gives it a nice, clean finish," Tabitha writes.
"Once everything is assembled, spray your cushions with Scotchgard for an extra safety measure. Allow it to dry," Tabitha adds.
TabithaSewer.com
For the couch frame:
- 2 x 4 wood
- 2 x 6 wood
- 2 x 10 wood
- Kreg Pocket Hole Jig
- Pocket-Hole Screws
- Wood screws
- Wood glue
- 80 grit and 120 grit sandpaper
- Wood filler
- Exterior stain and sealer
- Nail-on furniture glides
STEP 5: DIY APPLIQUE THROW PILLOWS
"For the pillows on our back patio, I did customize and then sew them up myself," Tabitha says. "For the custom letters, I cut them out with my sewing machine. If you don't have a sewing machine, there is another no-sew option where you can apply some interfacing to the back of your fabric, throw it into your cutting machine and cut it out. If you don't have a cutting machine, you can trace some letters onto your fabric and cut it out with your scissors and just iron it onto your fabric."

TabithaSewer.com
Materials:
- Silhouette Cameo 4
- Rotary Cutter
- ½ yd solid color canvas fabric
- ¼ yd print fabric of your choice
- ¼ yd medium weight interfacing
- 12 x 16 pillow insert
Directions:
- For the front of your pillow, cut the printed fabric and your interfacing at 13" x 17"
- For the back side of your pillow, cut the printed fabric at 9" x 17" and another at 7" x 17"
- Go into your Silhouette Design Studio, type in your chosen word. Tabitha's is "RELAX"
Font: Lucida Grande
Size: 307.89 This equates to about 3.25 inches
Style: BOLD - Before you cut, make sure that the rotary cute blade is installed. It makes cutting fabric in your machine such a breeze. Send it to your Silhouette and cut!
- Cut your letters out of your fabric as well as your interfacing.
- While that's cutting, prep your fabric. Iron the interfacing to the front fabric (the front of your pillow. This is a SUPER important step! This helps when sewing your letters onto your pillow. It stabilizes the fabric and it won't tug or pull which can create unsightly ripples in your fabric, so don't forget this step.
- Align your letters along the center of your front fabric. Once they are in place, attach your interfacing to each letter and iron onto the front fabric.
- Set your machine up on a zig-zag stitch. Tabitha set hers up at 5 width and 1 length (short and wide stitches). Zig zag stitch along the sides of the letters. Take your time and make sure the center of your foot aligns with the edge of your letter.
- For the back pieces of your fabric, hem one side (top and bottom).
- Attach the back pieces of your fabric to the front by pinning; right sides facing each other. Stitch all sides at ½ inch seam allowance.
- That's it! Flip your pillow cases right side out, slip your pillow inside and you're done.
STEP 6: DIY SWING

TabithaSewer.com
"I always see people taking the most beautiful photos on these boho swings, so of course I had to have one," Tabitha says. "No extra money was spent here. My husband just grabbed a scrap piece of wood and he put the swing together for me. For the tassel, I simply unraveled [several pieces of] rope and tied [them together in] a knot at the top to hold the swing in place."
STEP 7: HANG STRING LIGHTS

TabithaSewer.com
"For the lights, we purchased a 100-foot string of lights, so while my husband was stapling the lights to the upper deck beams, I went ahead and I screwed the lightbulbs in," Tabitha says.
Shop similar string lights here:
STEP 8: PAINT + HANG MIRRORS

Rachael Ray Show
"For the mirrors, we purchased each of them from a different store. We spray painted them gold and now they look like a complete set," Tabitha says.
Shop similar mirrors here:
STEP 9: DECORATE WITH PLANTS
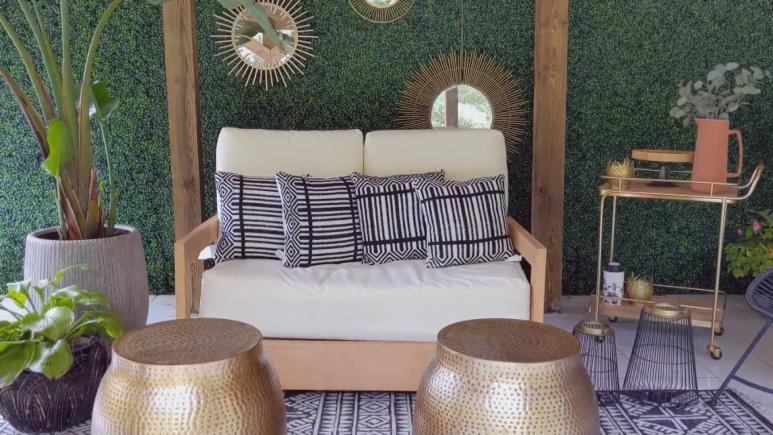
Rachael Ray Show
Tabitha purchased various plants and planters to really drive home the tropical oasis theme and further liven up the space (literally!).
Shop similar planters here:
STEP 10: COMPLETE THE SPACE WITH FURNITURE

TabithaSewer.com
Tabitha and Andrew chose gold, brass, black and wicker furniture to complete the boho theme.
Shop similar furniture items below:
For more DIY inspiration, check out these stories:
How to DIY a Beautiful Wood Cutting Board
3 Cheap & Cheerful DIYs To Update Your Home Décor
How To DIY Expensive-Looking Serving Trays For Under $25
How To DIY Vintage Milk Glass In TWO Steps
This DIY Guitar Shelf Is a Great Gift For The Musician In Your Life
MORE FROM ET: Shop the Best Home Decor Deals Still Available From Prime Day 2020